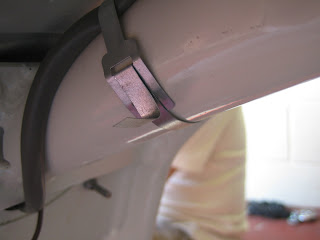
Although the position does vary from model to model, this is how they came off this machine, which was completely original, so this is how they are going back.
This first tie, is the one at the very rear of the scooter and secures the wiring loom only. First, loop the tie over the tube and insert it over and in to the nearest slot, like this:
Push it under the tie and out through the second slot as shown:
Pull as much of the tie through the two slots as possible to tighten the cable. You can squeeze it together with your fingers to get it a lighter tighter if required. When it is tight, bend the cable back on itself as shown.
You can press on this fold with your thumb to flatten it but I use a small nylon hammer to tap it flat like this:
Because this section of the frame tube is thinner that the main frame tube, you need to cut off around 2 inches from the end. Then fold over the remaining tie and flatten again.
The finished result should look something like this.
The following picture shows the position of the first cable tie.
The next tie goes just above the outrigger for the side panels as shown.
The last tie for now goes on as shown, making sure the loom wire is uppermost along the extension to the rear of the scooter. This ensures the loom is not trapped or fouled when the coil, CDI Unit or regulator are fitted as required.
The rest of the ties will be added at a later time when required.


No comments:
Post a Comment