The housing on the throttle side looks like this. It also houses the switch and lever for the front brake.

The flared end goes over this section of the headset bottom.
Push it over the throttle side bar like so...
As you do, align the two holes in the housing...
...with the two holes in the headset bottom...
Like this.
Use the pair of grub screws (shown below) only for this purpose, to attach the two.
Feed in the front brake cable outer...
Until it is snug in the recess in the lever housing portion.
You can then feed in the inner cable. It should push through smoothly.
Leave it like this for now.
Grease the throttle bar.
Notice the end of the bar has a nylon insert. Make sure this is a snug fit.
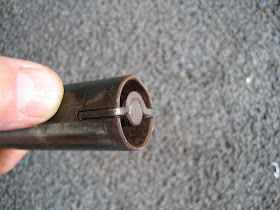
Insert the throttle control rod in to the outer throttle sleeve slots as shown.
Use two washers as shims. These are specific for the job. One is thicker but smaller in diameter and flat, the other is thinner, has a larger diameter and is slightly bowed. The smaller of the two goes on first.
And they fit snug to the housing like this.
Push the control rod and the outer sleeve together in to the end of the throttle bar.
Now clean away any excess grease from the outer sleeve.
The other end of the control rod should sit like this.
Drop your handlebar grip in to a bowl and pour over boiling water direct from a boiled kettle. Leave it to warm for a few minutes and then, whilst it is still very hot, push it over the degreased and clean surface of the throttle sleeve.
Push it on until there is only a fraction of a gap between the grip and the housing.
When the rubber cools, it will stay exactly in place and clamp on the throttle sleeve so it doesn't twist when in use. If you try to do this with the rubber cold, it will not be long enough to reach the housing and leave an ugly gap.
This side is finished for now.
When installing the switch, depending upon the thickness of the sheath around the wires, the front brake cable may need to be removed as it is quite a tight fit. It is sometimes easier to get the wiring through with the cable out of the way.
The wiring for the switch is fed through this apperture.


No comments:
Post a Comment
All comments require verification before publication to prevent spammers!