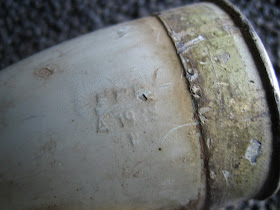
Removing the air filter box is fairly straight forward.
First, remove the spring clip from the air filter elbow.
Then, remove the spring clip from the air box itself by gently prying open the retaining lug.

Remove the carb rubber from the carburetor and the air elbow by undoing the two circular jubilee type clips. You can see one of the clips in the photo below. Take the rubber off and discard it. Any splits, cracks, wear or other damage and it is useless anyway. It is very unlikely your carb rubber will have survived on a scooter for almost 50 years without requiring replacement.

Next, remove the old filter from the elbow by undoing the wing nut on the inner side of the filter. Similarly, the filter can most likely be thrown away. New ones are cheap and easy to find and guaranteed to do the job properly. Notice at the end of the filter is a retaining plate with a concave centre that fits inward on the filter.

Here is the correct assembly order for your new filter when re-assembling.
Notice the two washers under the wing nut. This is usual.
The filter box 'was' held by the two upper bolts you removed earlier when you took off the air scoop. Now, just one nut is holding it in place and that is located here:
There is a bracket welded to the frame of your scooter with an open top and slot. In to this slot, the factory workers place a bolt with a square head, threads facing outward. The tab at the bottom of the air filter box slides on to this bolt and is secured in place using a 10mm nut with NO washer. The bolt is 20mm long in total (including square head). Notice that the main wiring loom goes up and over the air filter box bracket and under the air filter box itself. This is the way they are ALWAYS fitted at the factory. Positioning it here saves the need for another loom clip and prevents the loom from working loose and fouling the carburetor or petrol lever mechanism.
Once you have undone this nut, you can take out the air filter box and then remove the captive nut.
This picture (below) shows the bracket and bolt in position for the air filter box lower lug. I am holding the wiring loom out of the way for the photograph.
When replacing your wiring loom, it is important to remember it goes ABOVE this bracket. Like so:
Part No on air elbow is: Innocenti 19.91.6018 API A 1929 1
Part Number on the Air box is: Innocenti S921 IGM - 21058


No comments:
Post a Comment
All comments require verification before publication to prevent spammers!