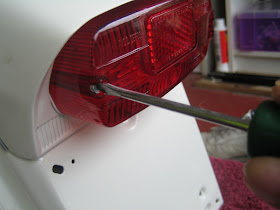
The components of the rear light and housing consist of the housing itself, the housing gasket, reflector and bulb holder.
Allow a small length of your wiring loom to show through the access hole at the rear of the frame.
Place the gasket in position first.
Your kit should include a short length of cable with a ring fitted to one end. This is the earth wire for the rear light. It is attached to the offside of the scooter on the rear bracket which fastens the housing to the frame. First, grind off a little paint to ensure a good ground contact. like so:
When fitting the rear housing, you require 2 x bolts specifically for the job. They each have a flat, square head which go in to the rear housing slots to prevent the bolt from turning whilst tightening from the underside. These are 30mm in length and 8mm bolts are used with flat washers to secure them.
When tightening up the bolts, keep an eye on the rubber gasket to make sure it is in the correct position. Keep checking as you tighten to ensure it is all in line. When you are satisfied, tighten fully. You can now push the earth wire through the access hole and the inside will look like this.
When fully tight, your rear light housing should be prefectly straight with equal gasket showing all the way around to create a secure and watertight seal. Like this.
Although not essential, I have fitted the earth wire by soldering it to the relevent lug, as opposed to using the spade fitting supplied. This almost guarantees a perfect earth, which is essential at this point on the scooter. Your two wires from the loom can be fitted to the two remaining spade fixtures. It doesn't matter which way around they go.
Apply a thin run of grease around the lip of the bulb holder and fit the rubber gasket. The gasket can only go one way as there is a round lug which fits in to the larger round hole near where my finger is in the shot below. Push in and turn the bulb to finish. The bulb should be a 'stop and tail' type with two elements. Again, it can only be put in one way around, so if you try to turn it and it is a problem, flip it the other way around.
Fasten the reflector to the housing using the two bolts which come with the kit.
Your rear light is fitted.


This comment has been removed by the author.
ReplyDelete