Firstly, ensure that the toolbox is clean and dry, particularly around the lip where the toolbox rubber seal is to be fitted.
The rubber seal has a slot, which can only be fitted one way around the aperture on the toolbox. To prepare for fitting this rubber, first drop it in boiled water for a few minutes to allow it to soften. This makes it much easier to handle and work around the tight corners.
Start at the top of the toolbox as it would be when fitted. The joint should be in the centre, just adjacent to the fixing lug as seen below.
Press on the rubber seal, working all the way around and pushing down to ensure a tight seat. It's quite tricky and may take two or three goes.
When installed, the seal should look like this:
With the join in the rubber at the top centre. Some rubbers come pre-cut, some come oversize and need to be trimmed. Trim the excess off after the rubber has cooled a little to allow for any shrinkage.
Offer the toolbox into the frame, leaning it back at an angle as shown below. Once inside the frame, position it more or less in place but don't push it in yet.
These are the fixings to hold the toolbox in place. Two longer bolts and one shorter one (for the upper lug). A set of 3 nylon shoulders, 3 tab washers and 3 nuts. They are 8mm.
Push the one short bolt, through the hole in the upper part of the frame from the inside of the toolbox as shown.
Behind it, the nut must pass between the two curved tabs of the top lug.
Losely fit at this stage.
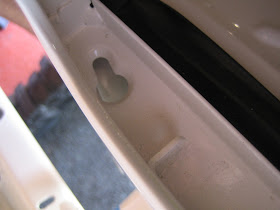
At the bottom of the toolbox aperture, you will see two slots like these (below). From inside the frame, offer up the two longer bolts and push the heads through the larger part of the hole and then accross in to the smaller slot.
The upper bolt holds the toolbox in place whilst you insert the two lower bolts
Here, you can see the correct position for the lower bolts. Attach the parts as described above and finger tighten them all.
When everything is finger tight, go round making sure that the rubber is still seated correctly on the aperture and that the lower bolts in particular are still in the right parts of the slotted hole.
Now you can fully tighten everything, watching nothing slips out of place as you go.
Note the tabs on the tab washer are folder upward on the top one and downward on the two lowers ones.
You should have a nice, tight and regularly spaced seal like this.
On all standard models, the toolbox would have arrived from the shop with a small tool roll. That was held in place with a small spring and clip like this:
It fits here:


No comments:
Post a Comment
All comments require verification before publication to prevent spammers!