Next thing to remove is the headset top.
You will be VERY fortunate if you manage to get all the fastenings undone here. As they are open to the elements, it is likely most will be tough to remove or seized solid.
Begin by removing the front light chrome rim. Normally attached with three threaded bolts. One either side and another underneath. My example has just two replacement screws, which are not standard and are almost welded in place by rust. I had to saw them off with a hacksaw. Later, I can attempt to remove the screw body using mole grips or even drilling them out and re threading the hole.
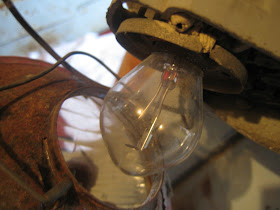
The rim is off and reveals the light unit behind. Ease the light unit out of the headset and behind it, you will see the main wiring cluster. This cluster also holds the bulbs for main and parking light (if fitted). To release the cluster from the light unit, simply flip off the wire clip holding it in position. It can only go upward. With the clip taken off, you can pull the cluster from the light unit.
Like so:
Note that the wire clip has two plastic sleeves helping to keep it in position laterally.
The Lend glass is marked:
Carello (with logo)
01.128.700 - IGM 0601 PX
01.135.700
To free the headset top from the bottom, you must remove the long bolt holding them together at either side. these bolts are located in the position seen below.

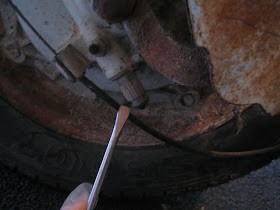
Once the two bolts are removed, you will also need to undo the speedo cable from it's location at the front wheel. It is attached in the position indicated below at the tip of my screwdriver. It is missing on this scooter. Undo the cover and pull out the cable from the wheel and housing. Make sure the cable is also freed from any clips or guides it is fed through around the fork area.
You can now lift up the headset top. Remove the speedo cable from the speedo itself and any wires going to the speedo light bulb. Once these are removed, the headset top is free to be removed.
Notice there is a rubber fitted at the factory at the outer edge of the headset top. This would both prevent vibration and water ingress.
These are the reminder of the screws that held the rim in place. Shouldn't be too hard to remove these and keep the threads clean.
The above image shows the remainder of one side of the headset where i had to drill out one of the bolts. Again, there is plenty to get hold of there to remove it later.
Headset Top markings:
Innocenti 19.96.1002
FPP A-1921 2


No comments:
Post a Comment
All comments require verification before publication to prevent spammers!